02. Social Media Marketing:
Post organically and take advantage of paid ads to reach new audiences and sell more tickets. In this section we cover best practices for essential marketing platforms like Facebook, Instagram, and TikTok so you can ensure there are no gaps in your social media strategy.
Marta Martin Buenaposada, Senior Performance Marketing Manager
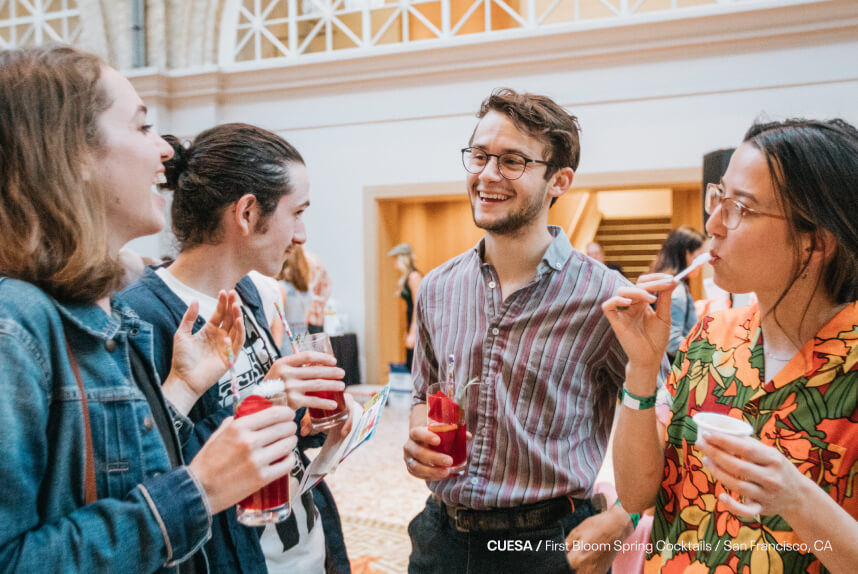
Successful event promotion means reaching your audience where they are, which makes Facebook a highly effective event marketing tool. More than 47 million Facebook Events are created each year, so it’s essential that your event stands out from the crowd and is easily discoverable.
Read on for tips on how to best use Facebook Events and for information that ensures your paid ads in Facebook Ads Manager drive awareness and attendance for your events.
Why you should utilise Eventbrite’s “Add to Facebook” tool
“I can already tell [Eventbrite] Boost gives me tools that I wouldn’t have [by] doing everything [just] on Facebook,” says Matt Orlove, the founder and CEO of ORLOVE, an LA-based event production company. With Eventbrite’s “Add to Facebook” tool, event organisers see 20% more paid ticket sales and 2x more registrations for free tickets.
Its other perks include:
- Easier checkout experience
Once your event is published on Facebook, audiences can seamlessly purchase tickets directly from your Facebook Event without being redirected elsewhere. This process, known as native checkout, substantially improves user experience, leading to fewer drop-offs and abandoned orders. And you’ll still be able to collect essential customer info like delivery and email addresses during checkout. - Reach more people
Events published with our “Add to Facebook” tool automatically become a Facebook Official Event and will contain important details like date, time, and venue. Since they’re more likely to show up in search and News Feed recommendations, they can significantly expand your reach.
- Save time with recurring events
Create your recurring event on Eventbrite and then use ‘Add to Facebook’ to reap the rewards of this feature.
Why you should create your first Facebook ad campaign with Eventbrite Boost
Eventbrite Boost helps you quickly create high-quality Facebook and Instagram ad campaigns, helping you get the most out of your ad budget. Eventbrite Boost gives personalised campaign recommendations based on how your customers purchase for your events, helping you run the right ad at the right time!
What makes Eventbrite Boost different from Facebook Ads Manager?
Event creators benefit from Facebook Advertising when they implement best practices. Most event creators do not implement these best practices in every campaign because of bandwidth constraints and limited marketing expertise.
Eventbrite Boost packages these techniques into a repeatable playbook/process that will work for every part of the event marketing lifecycle. Taking the learnings of 65,000+ event ad campaigns that generated £106 million in gross ticket sales, we have built a platform that makes sense to any event creator.
Below you’ll find a rundown of the key differentiators that set Eventbrite Boost apart.
- Conversion tracking that’s easy to understand: Advertising is an investment. It can be complex, time-consuming, and expensive if you’re guessing how to find your ticket buyers.
- Easily target multiple audiences: Most advertisers focus on a single audience when advertising. This is a risky strategy, equivalent to putting all of your eggs into one basket. By targeting multiple audiences with your ads, you can cast a wider net to find and win the most ticket buyers at the lost cost.
- A/B test audience and creatives (in minutes): Testing multiple variations of post text, images, and videos allows you to build an ad that will drive the most amount of engagement in the news feed.
- Budget optimisation prevents wasted ad spend: Budget optimisation means moving your budget around to the best-performing audiences and ads. This lets you stretch each pound in your budget to get the most return on ad spend. Eventbrite Boost’s real-time, around-the-clock budget optimisation constantly monitors every aspect of your campaign and shifts budgets to the right audience at the right time.
How to create a Facebook Official Event with Eventbrite’s “Add to Facebook” tool
Step 1: See if your event is eligible
The criteria for the “Add to Facebook” integration is straightforward. Find it in Eventbrite’s Help Centre. To qualify, your event must:
- Already be published on Eventbrite
- Have a physical location
- Use Eventbrite Payment Processing
- Have at least one ticket type (free or paid)
- NOT include donation tickets or group registrations
- NOT include access codes (however, tickets with coded discounts are eligible)
Step 2: Click “Add to Facebook” on your Eventbrite “Manage” page, and select a Facebook page to sync
Navigate to the “Manage” page for the event you wish to publish, then click “Add to Facebook” in the options menu under “Invite & Promote.” Connect your Facebook account to Eventbrite using your Facebook login email and password. Choose the Facebook page that will be publishing your event. Your event and tickets will display only on the selected Facebook page and never on your personal profile.
Top tip
If you’ve never accessed Facebook from within your Eventbrite account, you’ll need to grant permission to publish and update your event details on Facebook.
If you’ve never accessed Facebook from within your Eventbrite account, you’ll need to grant permission to publish and update your event details on Facebook.
Step 3: Create a Facebook Official Event
If your Facebook page has existing events, you’ll be given the option to either:
- Add a new Facebook event
Make sure your event details are correct, as they’ll carry over to your Facebook event. Even after you’ve added your event to Facebook, you can update information such as the event name or add in a new ticket tier. When you’re finished, scroll to the bottom of the page and click “Add to Facebook.” - Add tickets to an existing Facebook event
Review ticket and event details on your Eventbrite event, then scroll to the bottom of the page and click “Link to Facebook” to sell tickets directly through a Facebook event that you’ve already created.
Top tip
You must select an “Event Category” and an image to add your event to Facebook, even if you skipped these steps on your Eventbrite listing.
You must select an “Event Category” and an image to add your event to Facebook, even if you skipped these steps on your Eventbrite listing.
Step 4: Sell tickets and track sales
After you connect your Eventbrite event to Facebook, attendees can purchase tickets for your event without ever leaving Facebook.
To view ticket sales generated from your newly published Facebook event, navigate to the Analytics tool within your Eventbrite dashboard under the “Analyse” section. Select “Sales Channel” from the dropdown menu and choose “Detailed Sales Channel by Platform” as the “Group By” category.
Sales from your Facebook event will appear in the summary below the graph, under the “Eventbrite Buy on Facebook Integration” channel.
How to promote your events with Facebook ads
Millions of people around the world use Facebook to discover new events, but Facebook’s algorithms can make it difficult to capture your audience’s attention. These algorithms, which surface the most relevant content to users, are ever-changing and notoriously opaque. Stay one step ahead by adding paid ads to your organic social strategy. Budgeting for and producing high-quality ads can help generate real engagement and reach a larger audience.
Set up a Facebook Ads Manager account
Before you begin posting Facebook ads, use Ads Manager to:
- Create and install a Facebook pixel for your Eventbrite purchase pages
- Help to set up and structure your ad campaigns
Create and install a Facebook tracking pixel on your Eventbrite purchase pages
A tracking pixel is a Javascript code snippet that’s placed on a website to track people visiting that site. They are an essential part of running a successful ad campaign, enabling you to:
- Target customers who have visited your website and/or event listing pages with specific ads.
- Set up conversion events (see below) to measure the success of your ads by recording the actions visitors made on your web pages after they clicked on your ad. This can help you better understand which of your campaigns drove ticket sales, and which campaigns did not produce a worthwhile return on investment (ROI).
Get started by creating a pixel within Ads Manager, and then install it on your website.
- Go to Events Manager.
- Click “Connect Data Sources” (the green + button) and select “Web”
- Select “Facebook pixel” and click “Connect”
- Add your pixel name
- Enter your website URL to check for easy setup options
- Click “Continue”
Now you can put the Facebook pixel code directly on your website or event listing pages, providing insight into how well your ads drive ticket sales.
Set up your ad campaign
After your pixel is in place, you need to structure your ad campaigns. Facebook divides ad campaigns into three tiers:
- Campaign
Your Facebook campaign should be optimised to achieve a specific goal, such as growing your social media followers or collecting emails for a newsletter list. For example, if your aim is to drive ticket sales, it’s best to select “Conversions” as the objective and ticket purchases as your conversion event. You can set the conversion event on the pixel page in your Ad Manager. - Ad Set
This is where you can select an audience to advertise to, choose where your ads will be shown (mobile or desktop), schedule your ads to appear at a specific date or time, and set your budget and bid structure. - Ads
Design your ad copy, call-to-action, and creatives here. You can also test your ad design with the goal of answering questions like “Does this copy resonate with my audience?” or “Does image A perform better than image B?”
Identify your target audience
Effective targeting increases your number of conversions and reduces your overall ad spend, and Facebook features some of the most sophisticated targeting tools across all advertising platforms. It also allows you to create audiences of users who you want to reach. The platform features three audience types:
1. Saved
This is Facebook’s default method for creating audiences, allowing you to target ads based on location, age, gender, interests, connections, and other demographics. To create a Saved Audience:
- Navigate to the hamburger menu in the top left of the “Ads Manager” page and select “Audiences”
- Click “Create a Saved Audience”
- Build your audience as you normally would within the ad set, using parameters such as location, age, gender, interests, or connections
Once you’ve created a Saved Audience, you can re-select it from the Saved Audiences section of your campaign build.
2. Custom
Custom audiences are created using customer data you’ve already collected, such as past ticket purchasers. This makes it easy to reconnect with customers who are already interested in your business. Build a Custom Audience of past purchasers by:
- Download your past purchaser list as a CSV. Remove all columns except for “Email”
- Go to “Audiences” in Ads Manager
- If you already have audiences created, click the “Create Audience” dropdown and select “Custom Audience.” If you don’t have audiences created, you’ll see audience creation buttons rather than dropdowns
- Select “Create a Custom Audience” > “Customer File” > “Add from your own file”
Once you’ve uploaded the file, Facebook matches the data to existing users. The result is your Custom Audience.
How to create a retargeting audience using Custom Audiences
If your website traffic isn’t converting into ticket sales, retargeting is the solution. Retargeting serves targeted ads to people based on their prior engagement with your website. You can retarget potential customers who visited a specific page, viewed a specific event, or added a ticket to their shopping basket but didn’t make a purchase.
In Facebook, you can use Custom Audiences to retarget customers who visited your Eventbrite event listing page but didn’t make a purchase.
- In Ads Manager, hover over the hamburger menu and click “Audiences” under the Assets column
- Click “Create Audience” and choose “Custom Audience”
- Select “Website” as the method for reaching your audience
- Under “Events” select the drop-down “People who visited specific web pages” and input your event listing URL (for example: eventbrite.com/e/event-name-12345678910)
- Click “Exclude People” underneath the event listing URL and select the drop-down for “People who visited specific web pages”
- Input the slug of your confirmation page followed by the 10- to 12-digit event ID (for example: eventbrite.com/orderconfirmation/12345678910)
- Name your Custom Audience and click “Create Audience”
3. Lookalike
Once you’ve created a Custom Audience of past purchasers, you can find people similar to your custom audience based on their Facebook interests and behaviour. This is called a Lookalike Audience. Create one by:
- Clicking “Create Audiences” in the top left, then select “Create a Lookalike Audience” from the dropdown
- Choose your source (one of your Custom Audiences)
- Choose your country
- Adjust your audience size with the slider (smaller audiences will be more similar to your custom audience)
- Click “Create Audience”
It may take up to 24 hours for your Lookalike Audience to be created. After that, it’ll refresh every three to seven days, as long as you’re actively targeting ads to that audience.
Associate your Facebook pixel with your ad campaign
There are two ways you can do this:
- At the start of ad set creation, choose where you want to drive traffic, then select a pixel or event to track conversions. If you don’t have a pixel or an event, you’ll see instructions for creating one.
- Ensure your Facebook pixel is associated with an ad campaign by navigating to the “Ad” portion of the campaign setup. Under “Tracking,” confirm that the toggle next to the Facebook pixel is turned on. A green dot will appear when it’s on.
Capture attention with great imagery and copy
Make sure your Facebook ads have an impact.
Use eye-catching images
- Choose high-quality images with a minimum width of 600 pixels
- Photos should be bright and eye-catching
- Ensure there’s no more than 20% text within your image, per Facebook’s ad rules
- Test multiple images to see what works best
- Refresh your ad creative at least once during the ad lifecycle to avoid fatigue and disengagement
Write compelling copy
- Grab your audience’s attention with catchy headlines
- Keep copy concise and action-focused: 25 characters for headline, 90 characters for text
- Use a number in the headline if you’re running a promotional discount
- Create urgency with phrases like “Buy tickets now,” “Just announced,” or “Lineup confirmed”
- Use strong calls-to-action that align with your goals, along with call-to-action buttons
Provide a consistent experience
- Ensure imagery and messaging complement one another
- Match creatives with your landing page
- Ensure your tone is consistent with your brand, though a playful tone works best on Facebook
- Tell a story by updating your messaging. As you get closer to your event, change the copy from “Just announced” to things like “Buy tickets today” or “Low ticket warning”
Set campaign budget, bidding structure, and bid
Facebook offers substantial flexibility for setting and optimising campaign budgets.
Daily vs. lifetime budget
A lifetime budget sets an amount to spend over the lifetime of an ad set or campaign. Facebook will attempt to evenly distribute the amount you’ve opted to spend across your selected period of time. A daily budget is an average amount you’re willing to spend on an ad set or campaign every day. This gives you more control over what’s spent, especially if you have a strict budget. Start with a daily budget of at least £25 per day so you can deliver enough impressions for Facebook to optimise efficiency. Patty Pforte, the Senior Marketing Manager for Public Programs at CIIS, recommends Eventbrite Boost for nonprofits because “you’re always at the threat of not having enough, or going over budget every year.” Eventbrite Boost helps you better track your ad spend to avoid going over budget.
Automatic vs. manual bidding
Facebook is good at setting automatic bids, which help you get the most conversions or link clicks for the best price. If you know you want to target a certain cost per conversion, you may want to experiment with setting a manual target or max bid. Facebook will also ask whether you want to bid on a CPM (cost per thousand ad impressions), CPC (cost per click), or Optimised CPM basis. Optimised CPM shows your ads to people most likely to take the actions you want and will adjust your bid to maximise this exposure without going over budget. You can learn more about bidding and pricing in Facebook’s Advertising Help Centre.
Campaign budget optimisation (CBO)
Instead of setting individual ad set budgets, CBO automatically manages your campaign budget across ad sets to secure you the overall best results. You set one central campaign budget that continuously distributes in real time to ad sets with the best opportunities throughout your campaign.
CBO allows you to spend more on ad sets with the best opportunities and spend less on underperforming ad sets. You can set a daily or lifetime budget. If you use a lifetime budget, you can choose to run ads on a schedule. In that case, CBO works even if your active ad sets have different start and end times.
Instead of setting individual ad set budgets, CBO automatically manages your campaign budget across ad sets to secure you the overall best results. You set one central campaign budget that continuously distributes in real time to ad sets with the best opportunities throughout the course of your campaign.
CBO allows you to spend more on ad sets with the best opportunities and spend less on underperforming ad sets. You can set a daily or lifetime budget. If you use a lifetime budget, you can choose to run ads on a schedule. In that case, CBO works even if your active ad sets have different start and end times.
Here’s how to set up CBO:
- In Ads Manager, hover over the hamburger menu and click “Events Manager” under the Measure & Report column
- Click “Custom Conversions”
- Select “Purchase” as your website event
- In the drop-down menu under “Rule” select “URL”
- Under the URL, select “Contains” and input the Eventbrite event ID for the event you want to view
- Click “Create” to save your custom conversion
How to measure performance with Ads Manager
Facebook ad campaign reporting can be overwhelming. The Account Overview in Ads Manager shows how your entire ad account is performing, which offers insights into optimising future campaigns. We recommend customising your columns to show the information that provides the most value to you.
Customise your reporting columns to see relevant data
Matt Orlove is a fan of Eventbrite Boost’s clear data reporting, with an affinity for seeing how many tickets were sold. “The layout of the information when you’re running Boost is very simple and easy to understand,” he says.
You should create a custom reporting column that displays key metrics, including the number of purchases made, the conversion value of those purchases, and the return on ad spend. Here’s how to set this up:
- Navigate to your Ads Manager. Click “Campaigns,” “Ad Sets,” or “Ads” depending on what you want to view
- Click the “Columns” drop-down menu (next to the “View Setup” toggle)
- Select “Customise Columns” and type in the word “Purchase.” Check the boxes next to actions like “Purchases” or “Purchase ROAS.” You should see these metrics appear in the right column of the dialogue box when they are selected
- Click “Apply” and you’ll see these columns in your reporting table
If you want to save your custom view, click “Save as Preset” in the lower-left corner, give your custom reporting column a name (such as “ROAS”), and click “Apply.”
Top tip
“ROAS” refers to the total return on ad spend.
“ROAS” refers to the total return on ad spend.
Start running Facebook Event ads
Promote your event through Facebook advertising that’s specifically designed for events to reach a larger audience. Facebook Events ads allow you to:
Collect event responses
These ads provide relevant event details and encourage customers to respond with an “RSVP” action button to indicate if they’re “Interested” in the event or “Going.”
Drive ticket sales
Display a link for audiences to “Buy Tickets.”
You can customise event ads to target different kinds of potential buyers, such as people who have clicked “Going” versus those who have clicked “Interested.” Setting these ads up takes only a few minutes, since they automatically pull in the image and description from your Facebook Event. If you’ve already set up native checkout (detailed earlier in the Social chapter), “Get Tickets” allows fans to buy tickets without ever leaving Facebook.
Three common goals for Facebook Event ad campaigns
Drive awareness
Create a launch moment when your lineup is announced or tickets go on sale. Let past attendees know about upcoming events, but exclude anyone who’s already responded to your event.
Drive consideration
Get people to start planning with friends by highlighting premium experiences to past attendees and friends of anyone who’s already attending.
Retarget interested individuals
Don’t lose potential attendees who have shown interest in your event. Retargeting surfaces your ads to people who already engaged with your event but didn’t purchase a ticket. Use retargeting as an opportunity to stay top-of-mind, with last-minute messaging that drives urgency.
Targeting options for Facebook Event ads
Once you’ve identified your advertising goal and chosen the type of event ad you’ll be using, use event-specific audience targeting that’s available in the Ads Create Tool to:
- Target people who responded to your event and convert their interest into ticket sales
- Target friends of people who responded to your event to reach other interested audiences
- Exclude people who have already responded to your event to avoid advertising to people who have already purchased tickets
- Target people who viewed or responded to any of your previous events and reach people who showed interest in or attended previous events
Sophie Vershbow, Senior Social Marketing Strategist
People use Instagram every day to discover local businesses, find new experiences, and share what they discover with their friends. Convincing users to visit and follow your account may not be your only objective. If your goal is to sell tickets, you need to be strategic about how you use the platform.
Organic discovery and engagement strategies
Photos and videos shared with catchy captions are perfectly suited to the immediacy of the in-person or live-streamed event experience. Your tactics here should be two-fold:
- Share engaging content that attracts attention and inspires users to learn more and purchase tickets via a link in your bio
- Encourage audiences to share their own photos or videos that they capture during your event, preferably using a hashtag you created
Engage users to grow your audience
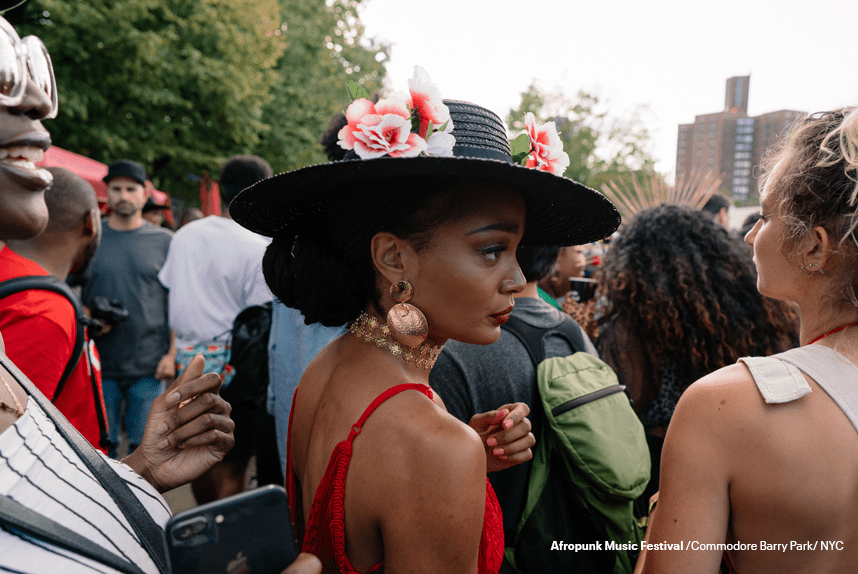
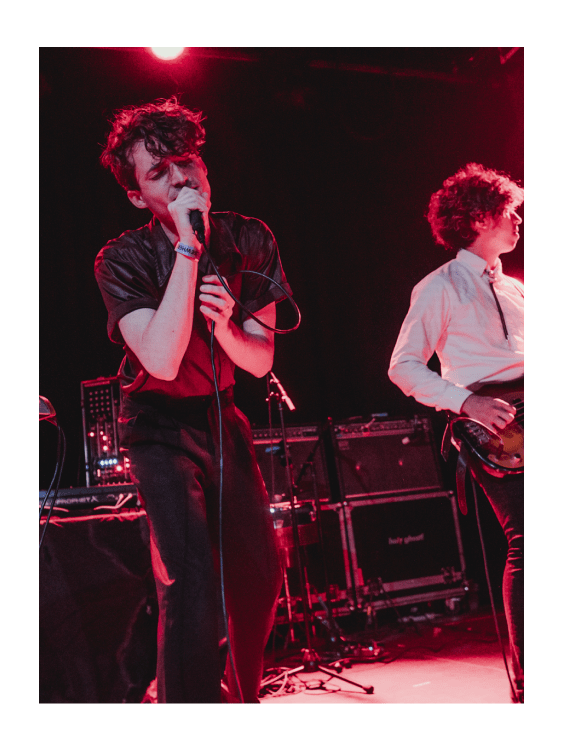
Live events are inherently photogenic, making them perfect for Instagram. To set event discovery in motion, post lots of eye-catching content. Bring your events to life with photos, live and composed videos, and Instagram Stories and Reels that give your followers (and potential followers) a colourful, interactive glimpse of the action.
During your event and in the time leading up to it, ensure your posts build excitement and hint at your event’s unique selling points. When your Instagram content is authentic, exciting, and interesting, your follower base will grow organically.
Instagram Story ideas for your next event
- Test new types of content: Because they disappear after 24 hours, Instagram Stories are ideal for testing new tactics or types of content. Build excitement with behind-the-scenes photos of your venue or food and drink vendors at your event.
- Tease announcements: Before announcements, tease the reveal with hints like blurred photos, inspiring followers to decipher the clues.
- Inspire FOMO: Showcase insider info and behind-the-scenes content promotions to incite the fear of missing out among your followers.
Bring your brand to life
Build ongoing engagement that leads to ticket sales by frequently publishing consistent, high-quality social media content. Besides posting about key milestones such as lineup announcements or on-sale dates, you should take advantage of all the ways Instagram lets you express your brand with organic content, including:
- Posting Instagram carousels centred around a theme (up to 10 photos at once)
- Sharing videos through Stories, Reels, and Instagram Live
- Using custom hashtags and geolocation tags to expand your reach
- Tagging influencers associated with your event, such as artists, sponsors, or vendors
Top tip
We know many attendees make last-minute purchases, but by engaging customers in the months leading up to your on-sale date, they’ll be even more eager to buy tickets as soon as they’re available for purchase.
We know many attendees make last-minute purchases, but by engaging customers in the months leading up to your on-sale date, they’ll be even more eager to buy tickets as soon as they’re available for purchase.
Encourage users to share their experience
User-generated content can attract your most valuable customers: brand loyalists. One attendee’s post from an event might inspire a handful of their friends to discover and follow that event’s Instagram account.
Instagram users want to share content about your event. In fact, according to an Eventbrite survey, 48% of millennials in the U.S. say they have attended live events specifically so they have content to share on social channels. Here are a few proactive steps you can take to engage your Instagram followers:
- Run Instagram contests, inviting audiences to post pictures from your event and tag your account (and a few of their friends) for the chance to win a prize
- Arrange partner agreements with sponsors, vendors, speakers, and influencers to post about your event using marketing assets you provide
- Create photogenic scenes at your event that Instagram users can capture and post
- Develop and prominently display custom hashtags, encouraging audiences to use them when posting about your event
- Be creative and bold — the more you encourage followers to discuss your brand online, the more quickly your events will be discovered
Marta Buenaposada, Senior Performance Marketing Manager
Promote your events with Instagram advertising
Instagram is a key platform for promoting your events, so be sure to allocate marketing spend accordingly. Instagram is committed to providing a seamless viewing experience whether a user is seeing sponsored posts in their feed or immersive, full-screen ads within Stories. Instagram Ads is fully integrated with Facebook Ads Manager, so you’ll reap the benefits of Facebook’s superior targeting options and campaign setup, including design and copy formatting. You can create and target specific audiences using Ads Manager, so refer to the advice on identifying your target audience in the above section on Facebook.
Create Instagram ads that work
When you’re ready to get serious about Instagram advertising, use an all-in-one marketing platform like Eventbrite Boost to help you make the most of your Instagram and Facebook ad spend through automation and optimisation guidance.
Eventbrite Boost places Instagram ads for you, pinpoints a target audience, and automates A/B testing to refine your ads for best results. You can manage this entire process directly from your Eventbrite Boost dashboard.
With Eventbrite Boost’s Instagram Growth Playbook, you can build your brand even when you’re not promoting events. The Playbook lets any brand or business increase their following on Instagram by creating Instagram Story ads that move interested customers directly into your profile. The more customers who find your profile, the less searching you’ll have to do for a strong potential audience.
Carefully curate Instagram ad placement
You can choose to run ads in the Instagram feed itself, in Instagram Stories, or on the Instagram Explore tab. Instagram feed ads may simultaneously run in other placements across Facebook, including Facebook’s news feed, plus side column ads, audience network ads, and messenger ads.
Instagram Story ads, however, won’t run anywhere else. Instagram ads can be more costly than similar placements on Facebook, so we recommend using a combination of placements, on both Instagram and Facebook, to ensure you stay within budget and maximise conversions.
How to measure performance in Facebook Ads manager
Like Facebook ads, Instagram ad performance metrics are available in Facebook Ads Manager after your Instagram ads begin running. Instagram ads use the same reporting tools that Facebook ads use, so you’ll be able to analyse metrics at the campaign, ad set, and individual ad levels. You can also schedule reports, save reports, and customise columns.
To view metrics for Instagram ads:
- Go to Facebook Ads Manager
- Select the campaign that contains the ad you’d like to review metrics for
- Click “View Charts”
- At the top of the chart, look for “Performance,” “Demographics,” and “Placement” data. Select “Placement.” If you selected Instagram as a placement, you should see metrics for it listed
- Depending on your chosen objective, you’ll see different results available. For example: you’ll see the total number of post engagements your Instagram ad received beside total reach of your Page post engagement ads. You can also view metrics like “Amount Spent” and “Cost per Result” to better understand how your budget is allocated
You can view additional metrics for Instagram ads from the campaign view of Ads Manager. Click the “Breakdown” dropdown and select “Placement” from the list under “By Delivery.” You’ll see a line item added for Instagram that shows “Feed,” “Story,” or “Mobile.” For more results directly related to Instagram, click the “Columns” dropdown. You can choose additional columns from the list or click “Customise Columns” to add additional ad metrics to the table.
Snapchat
Sophie Vershbow, Senior Social Marketing Strategist
Snapchat is a great place to promote events, thanks to its emphasis on sharing live experiences. The temporary lifespan of posts, which disappear after 24 hours, means the platform is ideally suited to driving a sense of exclusivity and FOMO that leads to online buzz and ticket sales.
To add Snapchat to your social media marketing strategy, follow these best practices:
Use custom geofilters
When followers visit a location, different geofilters directly related to that location become available for them to use on Snapchat. By creating a custom geofilter, you provide attendees with a personalised experience and make it easy for them to share content from your gig, festival, or performance.
Link to your website
Whether it’s your event listing page on Eventbrite, your website, or social media profile, you can maximise the potential of every post by adding a link. Simply upload your content, click the link button, and post the URL in the address bar.
Experiment with Snapchat ads
Like Facebook and Instagram, paid promotions enable your posts to reach more people and offer the option to target specific audiences.
TikTok
Sophie Vershbow, Senior Social Marketing Strategist
Many artists and event organisers are promoting via TikTok. The social media platform offers an active user base and delivers content for virtually every interest through its News Feed. TikTok’s paid advertising options allow organisers and marketers to target specific audiences with their sponsored posts and increase the discoverability of their event.
To add TikTok to your marketing repertoire, follow these best practices:
Post vertical videos
All video assets should adhere to TikTok’s ad specs, which differ according to where the ad will be placed: in-feed, News Feed series, or Vigo and Helo apps’ in-feed. That’s why it’s important to pay attention to elements such as ad composition, aspect ratio, image resolution, file type, and ad duration.
Keep content short and snappy
Make sure your video ad content is not trimmed by keeping the length between nine and 15 seconds.
Keep info front and centre
Don’t place details such as the venue, the date, or a special announcement at the margins of your video as they risk being cut off or obscured.
Do what you do best
Add in background music that fits your brand or the event you’re planning. These clips engage viewers who consume content with the audio turned on.
Ensure accessibility
For followers who watch with the volume off, add subtitles to ensure you get your point across.
Include a compelling CTA
Add a native button that prompts viewers to perform an action, whether it’s to visit your website or share your post with friends.
Feeling inspired and ready to host your next event? We’d love to help. Contact our events team or call us at (+44) 8081 689 320.
Resources:
Helpful links from Eventbrite
5 Minutes to Better Attendance: How to Promote an Event on Facebook
Grow Your Business with Paid Social Ads on Facebook and Instagram
From around the web