For event creators planning in-person events, health and safety is top-of-mind during COVID-19. Whether you’re building your own social-distance-friendly event space or modifying a traditional venue for healthy practices, Eventbrite’s customizable venue map is perfect for creating a ticketed floor plan for COVID-era events.
Eventbrite’s Venue Maps are more than just visual layouts of a venue. They’re clickable, shoppable floor plans, so attendees can easily buy the right tickets for their event experience.
Updated seating and occupancy maps foster your attendees’ trust. More importantly, however, they keep attendees safe. Now more than ever, being an event producer means putting your attendees’ health and safety first. Be sure to consult with local officials and follow all local guidelines for in-person events before you start planning. (For more safety tips, check out Eventbrite’s COVID-19 Safety Playbook for Events.)
Here’s how to set up a venue map for your socially-distanced event, along with some best practices for common pandemic-era ticketing challenges. (Note: this feature is only available to Professional and Premium organizers. Learn more about those plans here.)
How to set up a custom venue map
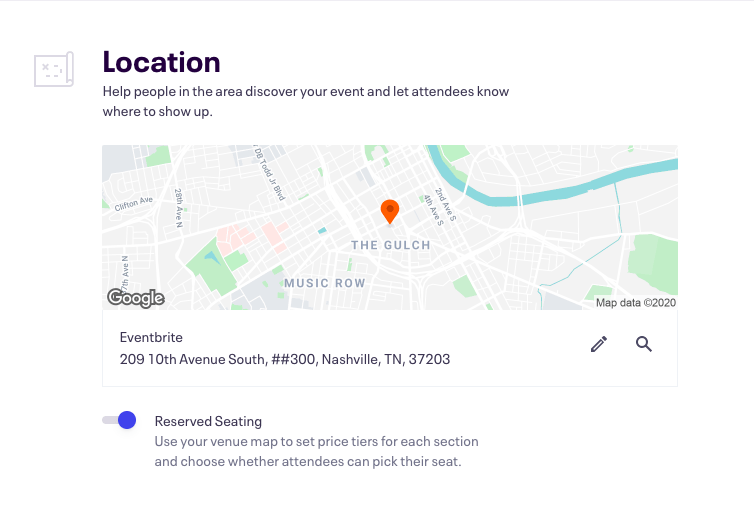
Setting up your custom venue map starts when you first create your event. After you click the “Create Event” button, you’ll be prompted to add a location to your event. Click “Venue,” fill in your venue location, and then select the “Reserved Seating” option. This option will allow you to create a venue map for your event.

After filling in the rest of the information, you’ll be taken to your event creation page. To build your venue map, click “Tickets,” then click “Create venue map.” This will open the Venue Designer, where you’ll be able to pick from a preset layout, or a blank canvas.
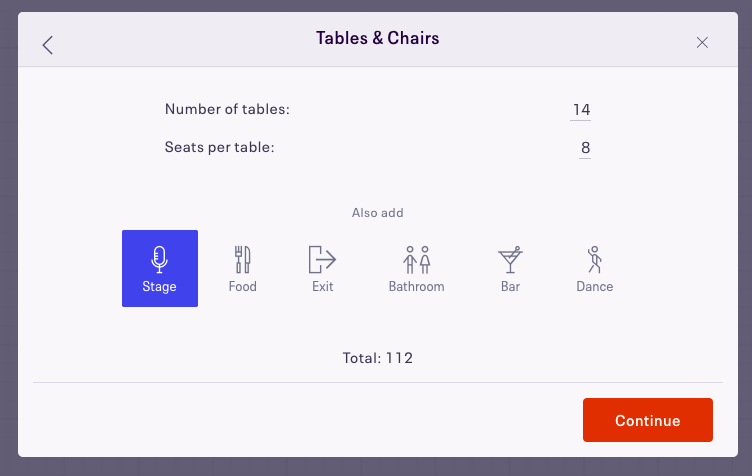
When creating your own socially-distant seat layout, you’ll likely start with a blank canvas and can follow the prompts to input the exact number of chairs and tables. If you’ve previously created a venue map for a location under the same account, you can pull up that map and modify it for reduced (and spaced out) capacities.
Pro tip: Whether you select a preset layout or a blank canvas, you can make as many changes to the map as you like.

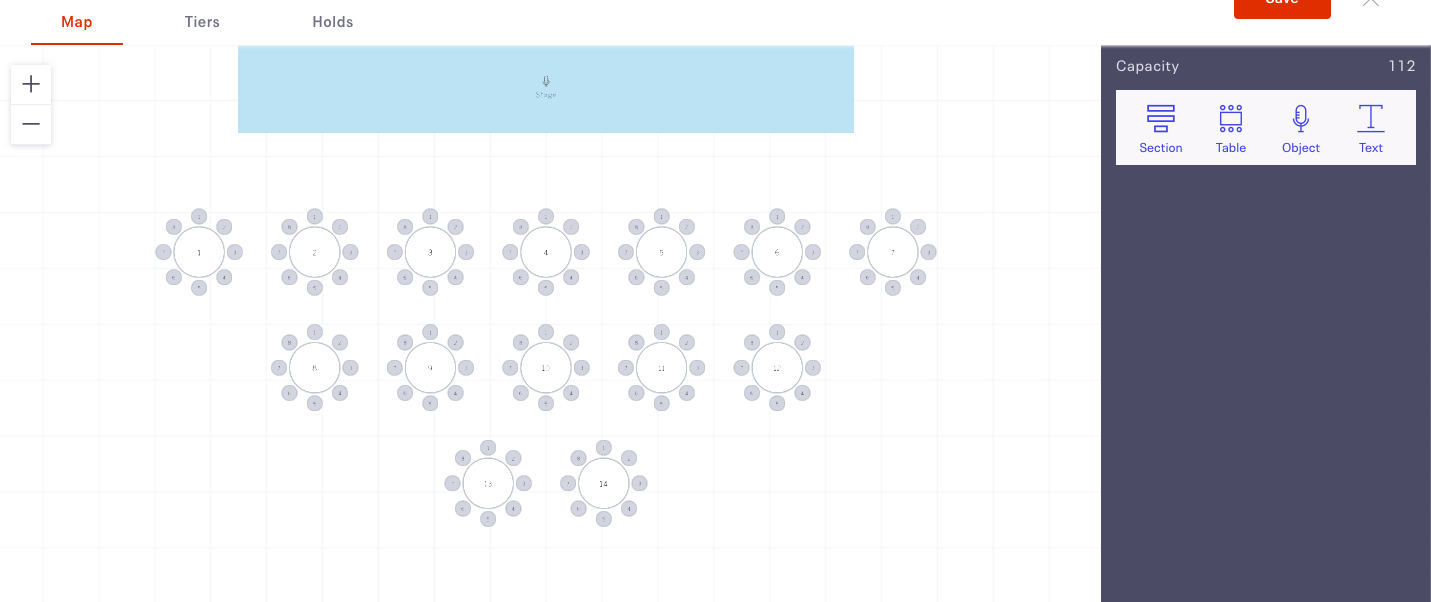
Add ticketed areas like Sections (for standing room or seating) or Tables with chairs. You can also include Objects (like stages, bars, bathrooms, and exits), and any Text you might want to add.
All ticketed areas, objects, and text can be edited and duplicated by clicking on them once they are created.
And don’t panic too much about the “Save” button. You can always edit the venue map before your event goes live by clicking “Tickets” on the left-hand menu, then clicking the “Edit Venue Map” button. Nothing is permanent until you publish your event.
Pro tip: Make sure your venue map and ticket assignments are exactly how you want them before publishing. Making changes to your map after your event goes live is much more difficult and can negatively impact your attendees’ purchasing experience.
—
Once you’ve got the basics down, there are a few things you can do to ensure a clear checkout process for your guests while social distancing measures are in place.
COVID-19 guidelines differ in every municipality, so be sure to rely on the most up-to-date local information to keep your attendees and staff safe. Then use that information to inform your event’s seating and ticketing choices.
We’ve compiled some of the most common best practices for displaying social distancing on your venue map below.
Using Sections to create social distance circles
If your event features socially-distanced standing room circles, you can use the Sections tool to add them to your map. Click the Section button to add a new Section, then select “General Admission” from the dropdown menu. Input the occupancy limit for each circle, then hit Create.
You can duplicate Sections easily by clicking the “Duplicate” button, then arranging them on your map.

Using Tiers to create single party tables and sections
Limiting tables and sections to separate parties is a common way to keep your event safe. So how do we ensure attendees purchase the entire section, or limit their parties to one section? The Tiers function.
Think of each Tier as a separate table or section, where the ticket price is the cost of one seat.
To start, go to your Venue Map, click on “Tiers” above the map, and click the “Add Tiers” button on the right side. You’ll create one Tier for each Table or Section on your map, and label each Tier to match the Table or Section names on your venue map.
Assign each Tier a different colour, then assign each Tier to its corresponding Table or Section. Once you’ve created a Tier for each table, hit Save and exit out of the Venue Map page by hitting the grey X.
To make sure attendees purchase a full table, head to the Tickets section of your event page. For each Tier, you’ll set your minimum and maximum number of purchasable tickets per Tier to the number of chairs at each table. For instance, if Table 1 has six chairs, assign the minimum number of tickets in Table 1’s tier as six, and the maximum number of tickets as six.
Finally, you can also consider adding a note to each tier under Advanced Settings, like “Your purchase is for a full table – Admission for 6”
When customers go to select tickets, they’ll see a list of numbered tables that are colour-coordinated with the venue map on the right side of their screen. This method makes it super easy for attendees to pick which table they want, and to purchase the right number of tickets.
Three ways to display socially distanced seating
If your event features rows of chairs with distance between them, mention it in your event description so attendees know how you’re handling social distancing. If you want to go further and depict distance between them on the map, you have a few options.
First, you can create rows of seats, and use the Hold function to cancel out any seats you’ll keep empty for safety. Any held seats appear unavailable to the customer. This is perfect if your event is in a venue with permanent seats, and you’re keeping a few seats open between each attendee.

Another option? You can add chairs to your map individually, and position them further apart from each other manually.
Finally, you can use the “Skew” slider to show distance between chairs in a straight row. Create a section with 1 row and as many seats as that row will have. When you select that row and click “Edit,” you’ll be able to drag the “Skew” slider to add distance between the chairs. This will create a diagonal line of chairs with extra space between them.
After you hit “apply”, you can rotate the row to the correct position on your map. Duplicate this section to create more rows.
Selecting checkout options for your custom map
When your venue map is set and all your tickets are assigned, head to click the “Tickets” button on the left-hand menu and go to “Settings”. You’ll see the option to “Allow attendees to pick their own seats.” If you uncheck this box, attendees will automatically assign attendees the best seats available per tier, based on the focal point of your map, like the stage.
We don’t recommend unchecking this box for socially distanced events. If your seats are spaced irregularly, attendees with multiple tickets may not end up sitting together. It may also interfere with attendees trying to buy a full table.
Create a custom seating map for your next in-person event or contact our sales team for more information.


